Thursday, January 26, 2012

JAY'S ARTSHOW

My brother Jay was born with Down Syndrome.  He will turn 50 on February 22.  He was lucky enough to live with his parents until three years ago, when his mother died.  Now he lives happily on Bainbridge Island, with my sister Lynn. Four days a week he attends a special needs, adult activities center, called  The Stephen's House, where he participates with other people like him.  He goes swimming, sees movies, works on projects, and looks forward to it every day.  Some of the clients of Stephen's House recently, were asked to show their artwork in a gallery called Bainbridge Arts and Crafts. Jay and I often work on watercolor paintings together so he had several paintings that were ready to show. Here's a preview.

                       Here is Jay working on his painting of  an avacado.  This is in my studio.


You have to forgive my photography.  The pictures are a bit askew and I kept picking up my flash in the photo.
This is a  pictures of Avacados, framed.  His paintings will hang in the gallery from Feb. 2 to 28.


Jay went home after our session together and worked on this painting/collage on his own.  I love it as it is such a wonder of tiny pieces of paper and tape.  He painted some and drew on some and filled in with colored paper.
It really is a marvel up close.


He painted these ears of corn during the summer.


Bell peppers.  This reminds me of Tuscany somehow.  Maybe it's the ochre background or the red matte, but it speaks of the Mediterranean to me.


Green Onions.  He really nailed the complicated structure of the green part.


Country Mailbox.  The foliage behind the mailbox is the real story in this painting.

So there you have it.  A preview of Jay's next art show.  If you feel like a ferry ride, come to Bainbridge Island and see it during the month of February.


The opening of the show will be February 3 for a "meet the artist" event from 5 to 7 PM.
You can also check out my earlier blog about Jay here. http://www.reneestonge.blogspot.com/2011/06/jay.html

Monday, January 23, 2012

I know it's not Halloween but....

Recently I was asked to help with the costumes for a play called "Dig It."  It will be performed at my grandson's school.  They needed skeleton shirts for a full class of children.  We had to make them quickly and cheaply.
I knew just what to do. I would make some stencils and paint the rib cage and arm bones onto black shirts.
I will take you through the process.

First I bought some clear acetate sheets from my local art store.  The sheets measured about 16 x 20 inches and were pretty heavy duty.  I bought Tulip brand fabric paint in Glacier white matte and also some sponge brushes from JoAnne Fabric.

I then drew out a ribcage on tissue paper, laid the acetate sheet over the top and using an exacto knife, cut out the shapes.  When cutting stencils you have to remember to leave connecting spots so that your stencil won't fall apart.


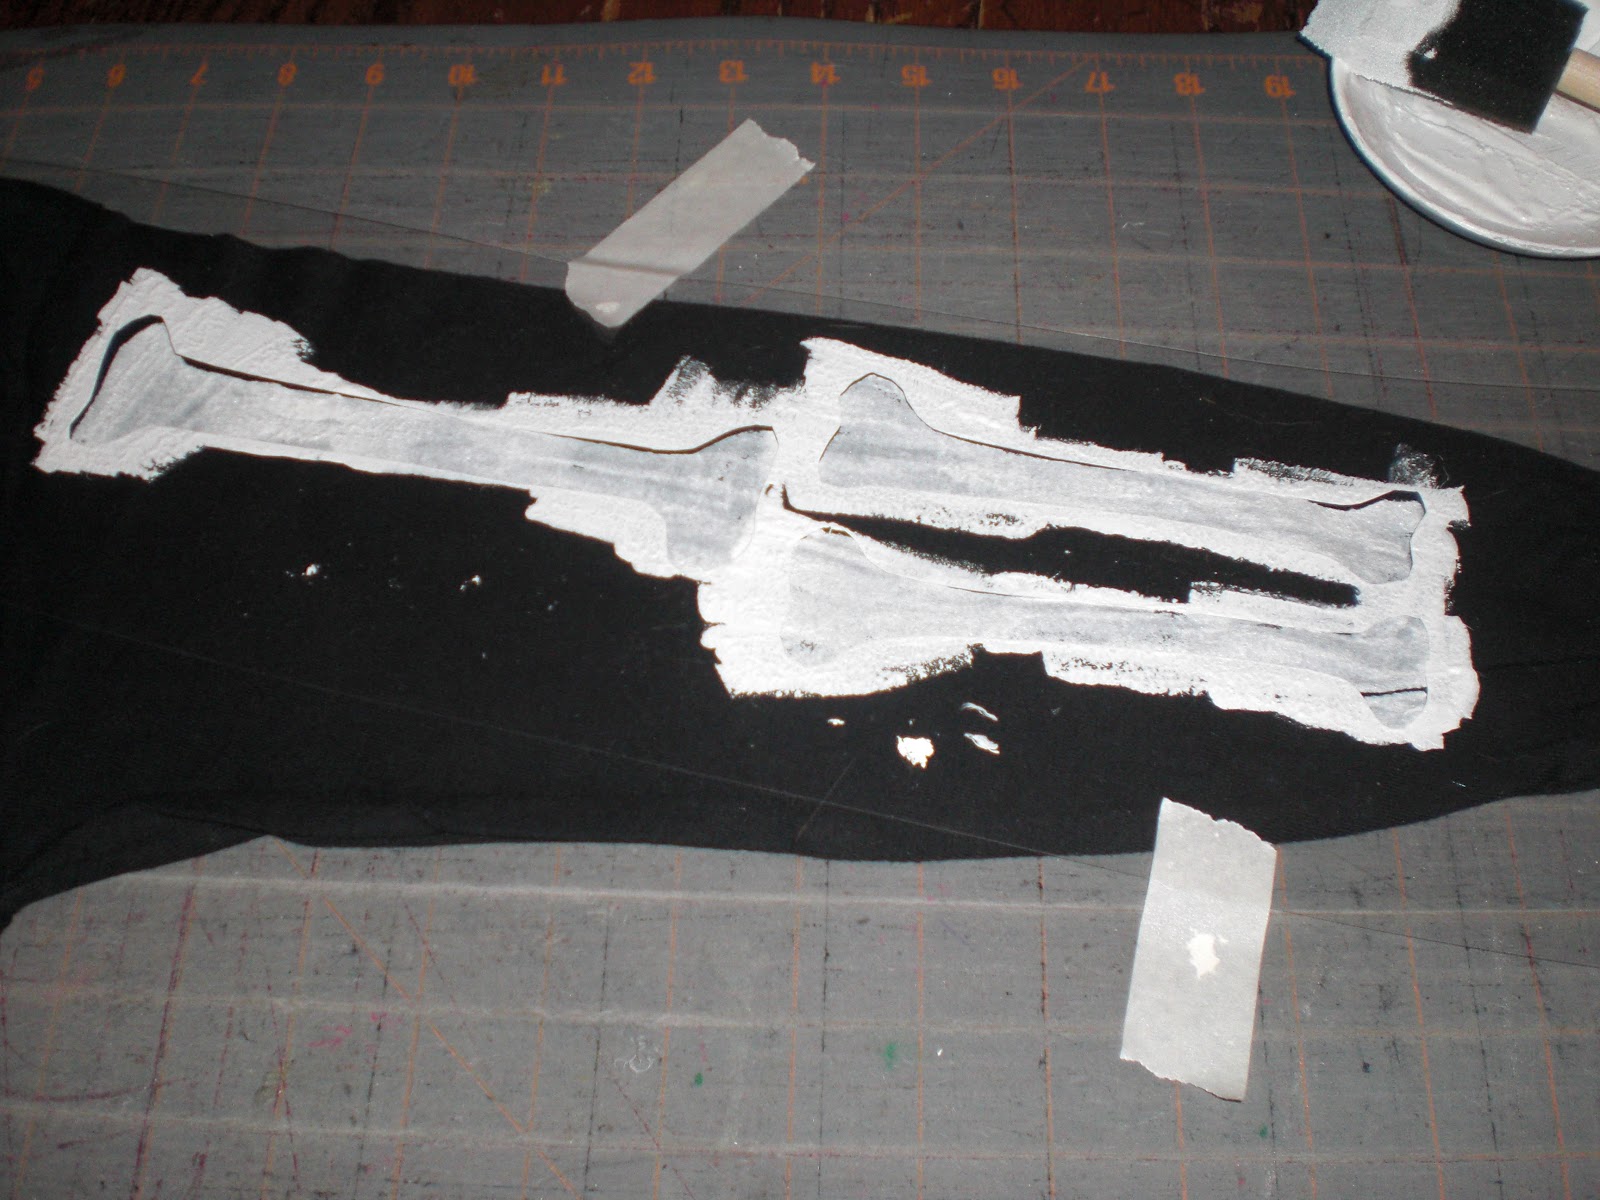
This is what it looks like after it has been used.  I would have shown the clear stencil, but it didn't show up.  Notice where there are spaces between all of the shapes.  That is really necessary.


I put just a little paint in a small bowl and used a sponge brush to apply it.


I laid the stencil over the shirt and taped it in a couple of spots to keep it from shifting.  Side note, it will shift and bleed but that's the nature of t-shirts.  From a distance it will look good.

Then I dabbed on the paint.  I did one layer and then because it was white, went over it again to brighten the white.


Here it is with the paint applied.....


And this is what it looks like fully painted.


Then I worked on the arms, which consisted of the main arm bone and two smaller bones.  I could look up the official names of these bones but I don't want to.


This is what the arm looks like.

The above were for the class, but I also needed a full skeleton for the main character named Lucy.


I added a pelvis and lengthened the bones in the arm since the girl who was to wear it is much taller than the others.
The pelvis was a completely different stencil.  As you can see the drawings are rough and "close" to accurate, but really I was only trying to get the concept across, not a anatomically correct skeleton.


I stenciled leg bones on to a pair of black leggings to complete the look.

And there you have it, just in case you ever need a skeleton costume.

Tuesday, January 3, 2012

Webster describes an heirloom as "something of special value handed down from one generation to another."
I can't say for sure if that's what I've been creating for 40 some years, but maybe.
I started making Christmas stocking in the shapes of shoes when my husband and I celebrated our first Christmas together.  As each new child came along I created a new "shoe" and when my kids got married and had their own children, I made more and more.  I'm not sure that anybody wants these shoe stockings as they start their own traditions, but as long as there is Christmas in my house, they will hang in it.


These are the stockings I have made over the years.  My husband, Jerry's, mine, my daughter, Robin's, my daughter, Roxanne's, my son, Jordan's, my grandson, Macario's and my daughter, Ryun's.
As I continued to make these the designs have gotten more elaborate and more decorated.
 
       My granddaughter, Addie's stocking became  a Russian slipper with gold ribbon and trim. The felt even sparkles.

This is Emmy's new stocking. It's a cozy little fur-lined
slipper with ribbons and buttons. It makes me think
of my granddaughter as she is warm and cozy, too.

She is oh so huggable!


My grandson, Colton is only 2 but I am sure he will be a great football player someday, just like his dad.  I made him a football cleat using Seahawk colors and the Nike swoosh.


My newest Granddaughter is Olive.  I made her a cute and dainty little "Mary Jane".  I kept choosing these colors from my ribbon box and then realized that the green was a perfect olive green. Ah, the subconscious mind is a wonderful thing!


And, finally, my daughter-in-law, Jane's stocking.  I chose these ribbons and colors because they are fun and playful just like Jane.  She sent me a tutorial on how to make the felt flower on the toe.


So this is Adam's family's new group of stockings.


And this is Aaron's family's stockings.  I hope they like the new additions.

Tuesday, November 29, 2011

THE NUTCRACKER ARABIAN

I love costuming.  I love the whole process from talking to the choreographer to drawing out the design to choosing the fabrics and trims and finally creating what was in our minds. So, recently, when I was asked to design and sew a costume for a young dancer who is to perform the Arabian dance from the Nutcracker Ballet, I jumped at it. I love this dance and the music.  It is mysterious and sensual, full of the scents and tastes of the middle east. I wanted to fully capture the flavors in a costume for a 12 year old girl.  Yikes!


The choreographer always has a vision of what she wants.  Trying to see her vision and translate that into a 3 dimensional product is the challenge. You have to take into consideration the age of the dancer, and her size.  You have to be aware of the types of movements as the dance flows.

(Unfortunately, my dress form is old and falling apart and doesn't really show the costume well.)


The choreographer, Amber, wanted rich burgundy and golds.   I found these fabrics that are more cranberry but beautifully embroidered with pink and white flowers and covered in sequins.  The skirt is a mesh knit and drapes and flows beautifully a quality I look for in a dancer's costume. Amber was sold.

She wanted the skirt to be longer in the back than the front so I cut a full 60 inch circle and put the waist hole off center so that the front was 23 inches and the back 37 inches.


Amber wanted the skirt drawn up in the front.  She also wanted lots of trim. I put beaded fringe below the yoke and gold fringe around the skirt.  Gold tassels hide where I used ribbon to pull the skirt up.  The ribbons allow the skirt to be adjusted to the height and drape that the dancer wants.


The top also has lots of trim.  We wanted a sweetheart neckline and little cap sleeves. This fabric is a lovely sheer which I overlayed on an iridescent silk.
Gold and berry trim at the neck and jangelly red and gold beads with sequin trim finish off the top.  Finally, a red gem in the center adds one more bit of sparkle.


The trouble with sleeves is that when a dancer lifts her arms the sleeve can't be too tight, nor should they lift the top up as she moves. These are not connected at the armpit.

All in all I think the costume turned out nicely.  It danced beautifully and allowed movement.  I was quite happy with it.


Wednesday, November 9, 2011

Birdbath Part Deux

Our email conversations went like this. Aaron, "I like your blue birdbath."  Me, "Thanks. Want One?" Aaron, "Sure. :-)"  So when I visited my son and his wife, Jane, in Houston, Texas we rolled up our sleeves and got to work.


Aaron had an old pottery birdbath that we dug out of the shed.  It was pretty dirty and needed a good scrubbing.


Some clean water and a scrub brush got it clean.  Then I let it dry in the hot Texas sun.


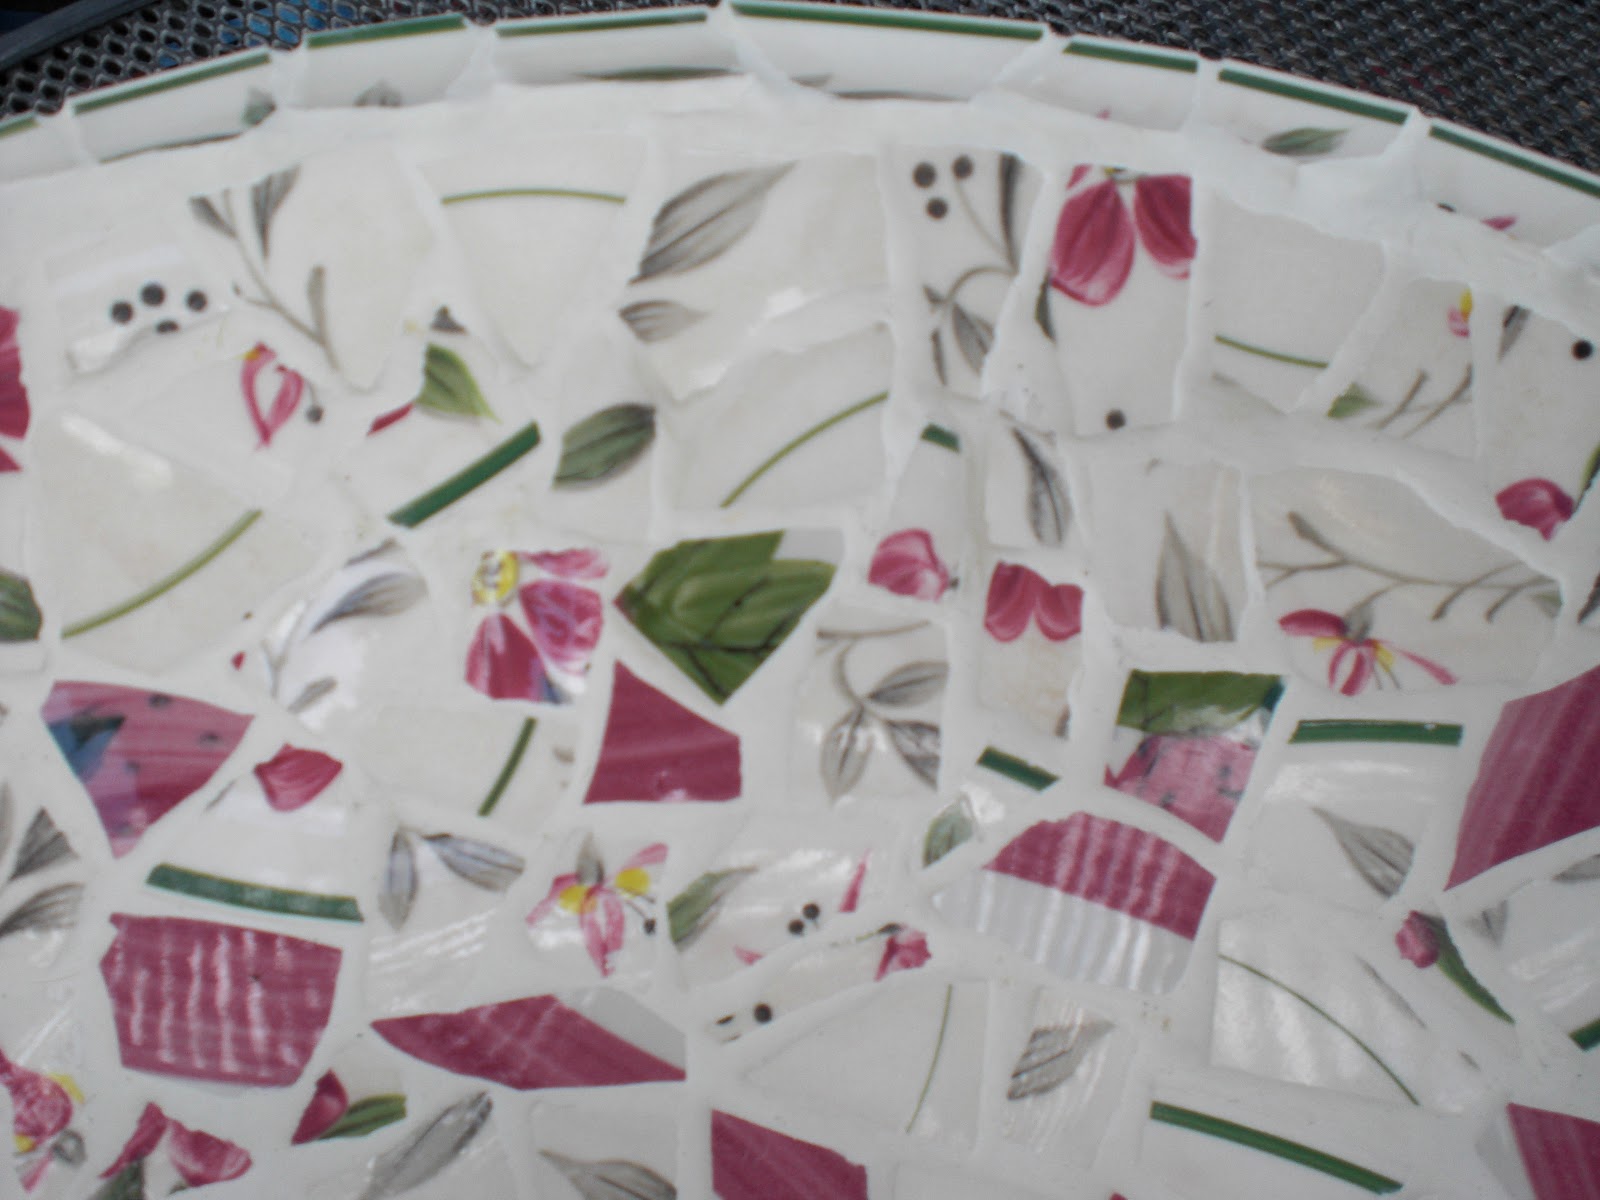
We needed some plates to break up for the mosaic work, so one night after dinner, about 8:00, we packed up the baby and headed for a nearby Goodwill. That store is great for finding treasures.  Alas, these were the only plates with a colorful pattern that we could find.

We gave Goodwill our $8.00 and left the store with 5 plates and a bowl that kind of matched.  The pattern is a bit too fussy and pink for my taste but our shopping had time constraints.


After donning some stylish protective eye wear, I placed some plates inside a paper bag and gave them some good wacks with a hammer.  The bag keeps the shards from flying all over the place.


I was able to cut the larger pieces with a tile cutter, a luxury I didn't have on my 1st attempt.  This was a very handy tool.


Once again, I used the rim of the plates for the rim of the birdbath.  It gives it a smooth, finished look.  Then I began placing the tiles down the side, "buttering" the backs of the tiles with mastic, or tile glue.


The tiles are set and ready to be grouted.


Note that there is a lot of space between the pieces.  That's okay as the grout will fill in and the tiled area will not be walked on.

Now I wait for 24 hours before I grout.


I used a pre-mixed white grout and applied it with a putty knife working it into the crevices with an old paint brush. Then I took Jane's kitchen sponge and started wiping off the excess grout.  That turned out to be a bad idea since it left bits of sponge between the tiles. I did replace Jane's sponge.


 A damp cloth, (ripped up old t-shirt) proved a better solution. I wiped off most of the gooey stuff rinsing the cloth in a bucket of water, then took dry cloths to finish and polish.  I had to re-grout some areas where I got over zealous.


The finished product on it's stand in the garden.  In hindsight, I wish I had used a colored grout as there was so much white tile.  Mother Nature and abuse should soften the look, though, I think.


I had a wonderful time visiting my family and playing with my 1 year old grandaughter, Olive.  I hope to visit again soon.


Here is Jane and Olive.  She's wearing a tutu I made her for her birthday.

Wednesday, November 2, 2011

Christmas is in the air

I'm visiting my wonderful son, Aaron, his beautiful wife, Jane and their oh so cute baby, Olive in Houston, Texas. That's Olive in the picture far right on the top. I'm enjoying every minute with them and while daddy is at work Jane and I have been playing on Etsy.  Jane is very good at navigating the web site and is teaching me so much.  We put together this page of treasury items that we hope will be featured on the site.  It contains some of my artwork from my Etsy shop: StOngeStudio  and Jane's shop: PrettyLittlePicnic.  We hope that you like what we put together.  The other shops featured have very interesting things, too.  Have fun looking.


Sunday, October 23, 2011

CHRISTMAS CARDS

Several years ago, I worked for Macy's Department store in the Christmas shop. It was lots of fun and I worked with some very nice ladies.  We met a lot of people and helped bring visions of sugarplums into their homes. I noticed a trend however.  Shoppers of African American descent were looking for a traditional Santa Claus who was also African American. That made perfect sense to me since Santa is a magical being and can appear in any form.  Macy's had no black Santas and when I researched Christmas cards, there were very few of them. I decided to paint some artwork showing Santa doing traditional Christmas things.

Here's Santa  walking on a pristine snowy field.  His snowshoes have a peace symbol on the soles and he is leaving "peaceful" tracks as he walks.  The cozy cabin in the background also has a peace sign on the window welcoming all who enter.  A fat, happy snowman watches over the scene.  Inside the card says, "May the peace of the Holidays follow you throughout the New Year."

It is very difficult to get artwork accepted into the mainstream.  I think the quality of my paintings is very good, but perhaps when I was trying, the U.S. market was not ready for an African American Santa. I hope it is now.

Santa is looking at the Christmas Star as he and his reindeer stand by a frozen pond. The star is reflected in the pool.  Santa is awestruck, the reindeer, merely curious.
Inside the card says, "Hoping you find your bright and shining star this season."

When I first created these cards, I sent them to card companies like Hallmark, and American Greeting, but they were not interested in them.


Santa is in his workshop making wonderful toys for the children of the world.  He seems to put so much love into the process.  The toys in the background watch him.  Inside the card says, "Wishing you all the joys of his Holiday Season."

I also contacted Ebony Magazine to see if they knew of African American based greeting card companies who might be interested in my Santas.  I never got a response.

A little girl has heard Santa and woken up.  She's a bit scared and shy.  Santa sits down to comfort her.  He is telling her the Christmas story.  Inside the card says, "May the wonders of the season last throughout the New Year."

I researched ebay but found that too daunting. ( I'm a chicken when it comes to ebay.) and I didn't like the quality of work I saw on it.


Mr. and Mrs. Claus are sitting with a collection of dolls that Santa and his elves have made. You can tell that they are fond of each other and they are very proud of their work. They want to share these dolls with children everywhere. Inside the card says, "Greetings from Santa and the gang."

I even sent this collection of cards to Oprah Winfrey because she supports women and their dreams.  Alas, they were returned unopened. I felt I was out of options so the artwork sat in my room collecting dust.

This year, I'm selling them on etsy.com    The cards measure 5 x 7 and come with a white envelope.  They are printed on low gloss card stock.
Check out my site:  StOngeStudio under shops, or type in the search "African American Santas"  under homemade. Wish me success!