I knew just what to do. I would make some stencils and paint the rib cage and arm bones onto black shirts.
I will take you through the process.
First I bought some clear acetate sheets from my local art store. The sheets measured about 16 x 20 inches and were pretty heavy duty. I bought Tulip brand fabric paint in Glacier white matte and also some sponge brushes from JoAnne Fabric.
I then drew out a ribcage on tissue paper, laid the acetate sheet over the top and using an exacto knife, cut out the shapes. When cutting stencils you have to remember to leave connecting spots so that your stencil won't fall apart.

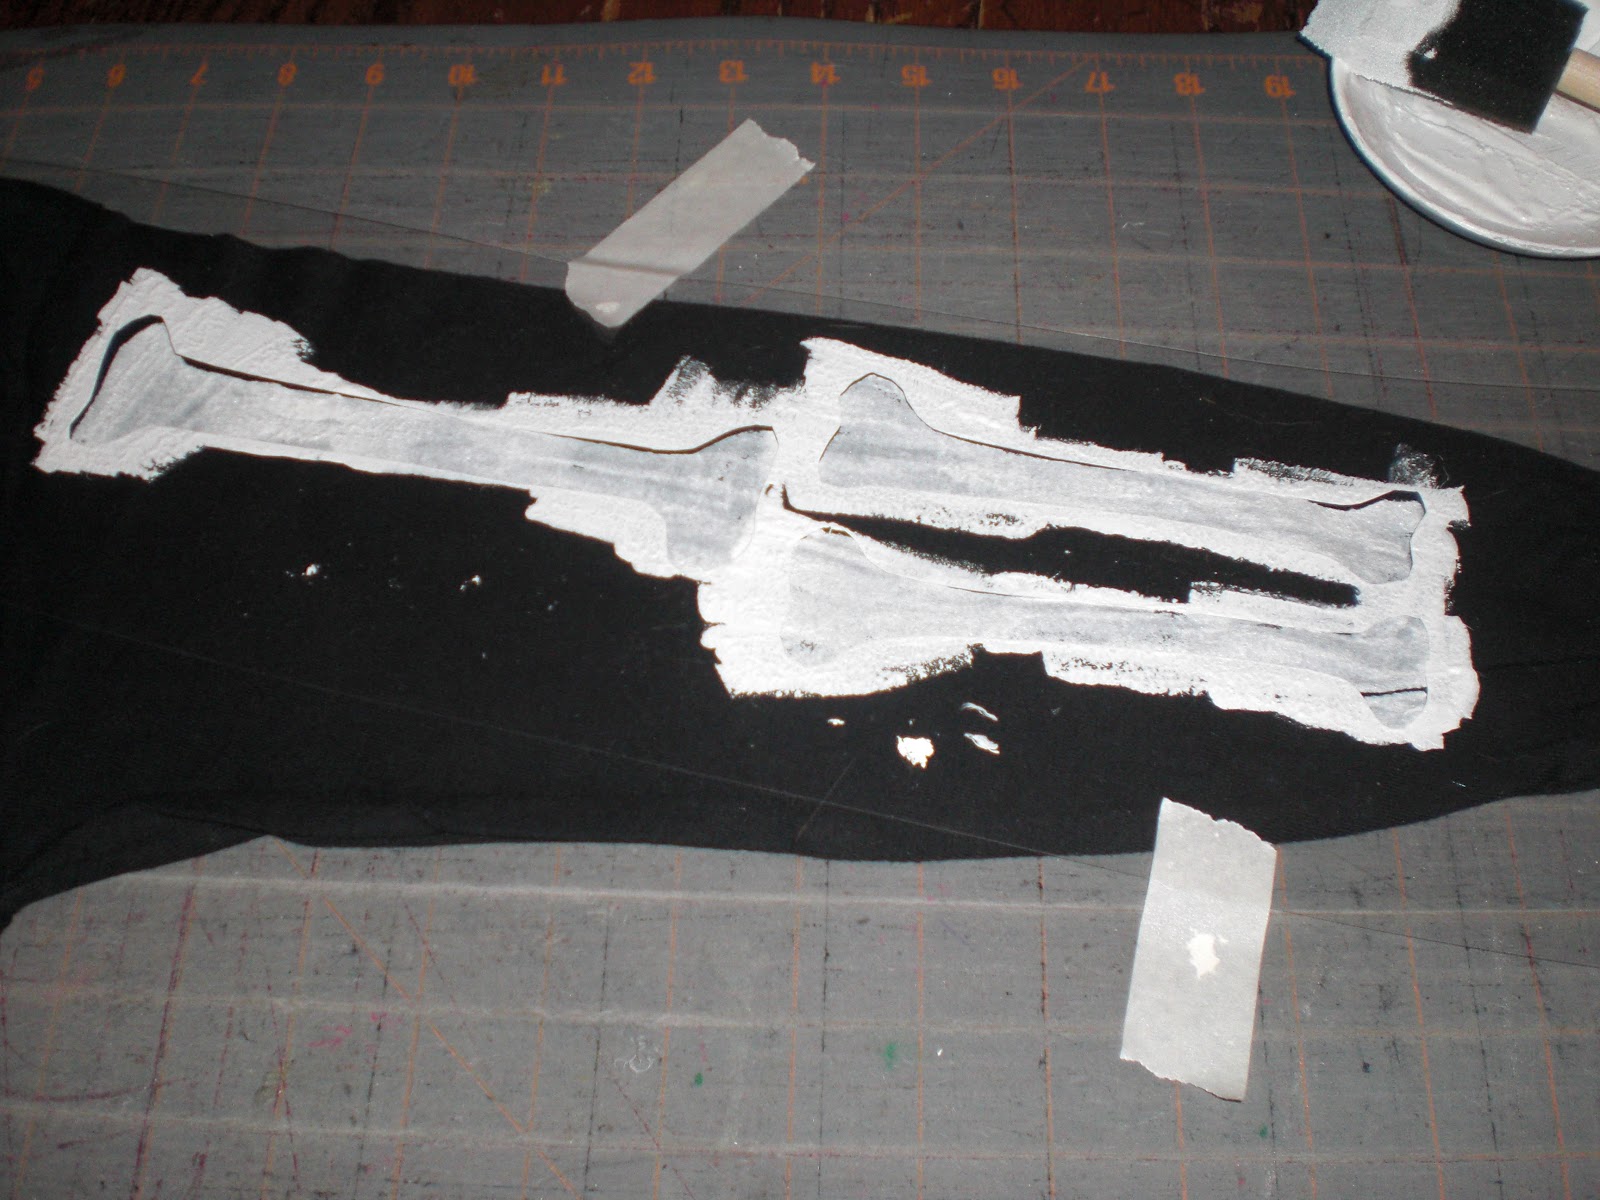
This is what it looks like after it has been used. I would have shown the clear stencil, but it didn't show up. Notice where there are spaces between all of the shapes. That is really necessary.

I put just a little paint in a small bowl and used a sponge brush to apply it.

I laid the stencil over the shirt and taped it in a couple of spots to keep it from shifting. Side note, it will shift and bleed but that's the nature of t-shirts. From a distance it will look good.
Then I dabbed on the paint. I did one layer and then because it was white, went over it again to brighten the white.

Here it is with the paint applied.....

And this is what it looks like fully painted.
Then I worked on the arms, which consisted of the main arm bone and two smaller bones. I could look up the official names of these bones but I don't want to.

This is what the arm looks like.
The above were for the class, but I also needed a full skeleton for the main character named Lucy.

I added a pelvis and lengthened the bones in the arm since the girl who was to wear it is much taller than the others.
The pelvis was a completely different stencil. As you can see the drawings are rough and "close" to accurate, but really I was only trying to get the concept across, not a anatomically correct skeleton.

I stenciled leg bones on to a pair of black leggings to complete the look.
And there you have it, just in case you ever need a skeleton costume.
No comments:
Post a Comment